

我们首先看一下copilot项目的package.json整体结构:
css复制代码module.exports = {
  name: "copilot",
  displayName: "GitHub Copilot",
  description: "Your AI pair programmer",
  version: "1.134.0",
  build: "535",
  buildType: "prod",
  publisher: "GitHub",
  pricing: "Trial",
  extensionPack: ["GitHub.copilot-chat"],
  engines: {
    vscode: "^1.75.0",
    node: ">=16.14.0",
    npm: ">=8.0.0",
  },
  activationEvents: ["onStartupFinished"],
  main: "./dist/extension",
  contributes: {
    // ...
  },
};
这里我省略了一系列不需要关注的字段,重点关注几个字段:
displayName这个是在vscode插件市场展示的名称。publisher也会在vscode插件市场展示。pricing的值是”Trial”,意味着copilot不是一个免费的插件,vscode默认插件是Free。extensionPack为”Github.copilot-chat”,意味着和chat插件是捆绑的,安装copilot插件的同时也会安装chat插件。activationEvents是“onStartupFinished”,意味着入口的activate函数是vscode启动后触发。main是”dist/extension”意味着插件的入口文件是extension.jscontributes代表着vscode插件的一系列配置项,这个我们接下来详细分析。
Contributes的主体结构
ini复制代码{
  walkthroughs: [

  ],
  commands: [

  ],
  keybindings: [

  ],
  menus: {

  },
  configuration: [

  ],
  configurationDefaults: {

  },
  languages: [

  ],
  grammars: [

  ],
  icons: {

  },
  iconFonts: [

  ],
}
Contributes的主体结构主要包含以下内容:
walkthroughs,欢迎界面相关配置。commands,vscode插件命令配置。keybindings,快捷键配置。menus,vscode菜单配置。configuration,copilot配置项。configurationDefaults,copilot覆写的vscode配置项。languages,语言配置。grammars,语法配置。icons、iconFonts属于图标相关的配置。
我们接下来重点分析一下walkthroughs、commands、keybindings、menus、configuration这五个字段。
walkthroughs字段
walkthroughts是插件安装完成之后展示的欢迎页配置,它的第一层结构如下:
csharp复制代码{
  id: "copilotWelcome",
  title: "GitHub Copilot",
  description:
    "Your AI pair programmer to write code faster and with less work",
  when: "!isWeb",
  steps: [
    // ...
  ]
},
这里面我们可以看到,它是在非web下展示的,几个字段分别对应以下框选出来的:
image
在steps里面,共分为6步:
第一步 – Sign in with GitHub
sql复制代码{
  id: "copilot.signin",
  title: "Sign in with GitHub",
  description: `To get started with Copilot, sign in with your GitHub account.
Double-check to use the right GitHub account. You can also sign in later using the account menu.

[Sign In](command:github.copilot.signIn)`,
  when: "!github.copilot.activated",
  completionEvents: ["onContext:github.copilot.activated"],
  media: {
    image: "assets/walkthrough/sign-in.svg",
    altText:
      "Sign in to GitHub via Copilot's notification or VS Code's account menu",
  },
},
这个引导的显示条件是!github.copilot.activated ,在vscode插件配置中,这个称之为when clause,这里面使用的是有限的表达式语法,变量可以通过插件进行setContext写入。
很明显,这里copilot肯定是在登录Github账号之后,将这个activated变量置为true。
注意的是,这里的description是一个markdown的语法,[Sign In](command:github.copilot.signIn) 会被渲染成一个按钮,并且触发对应的action。
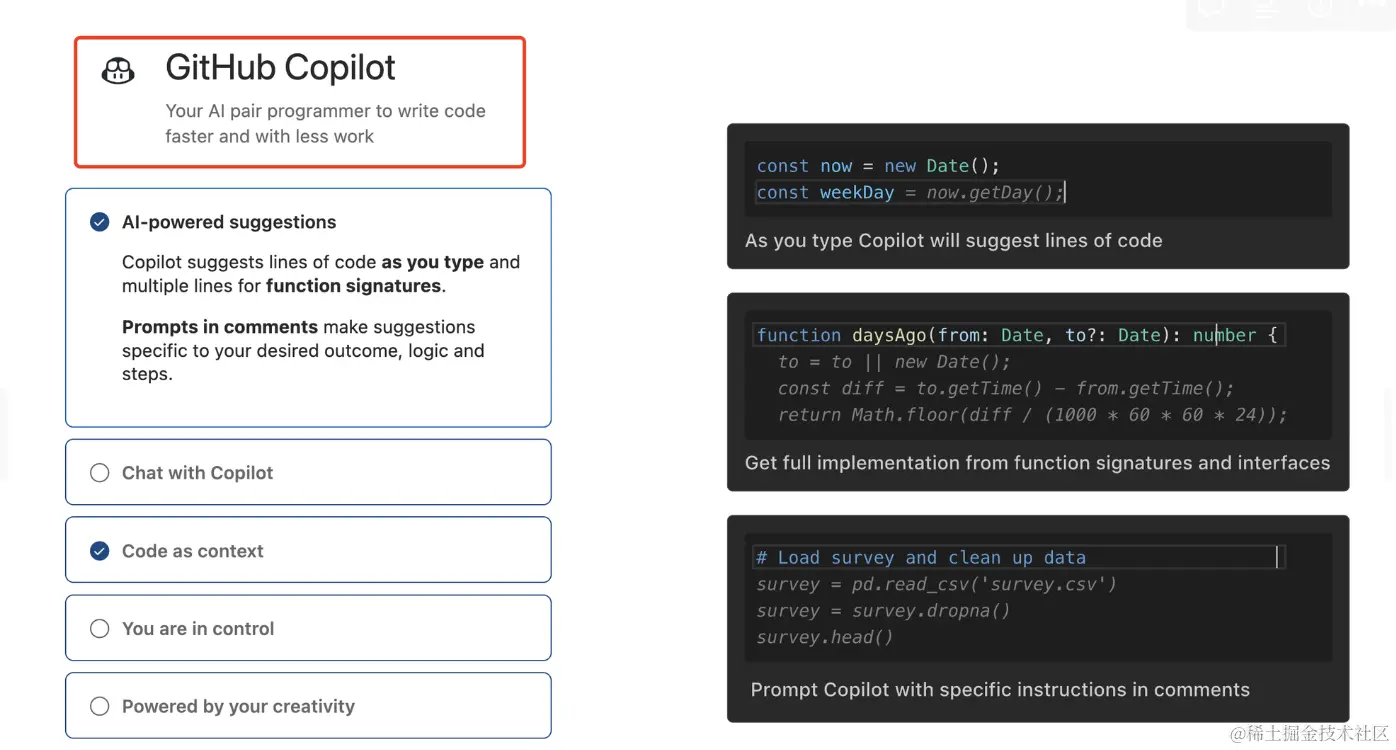
第二步 – AI-powered suggestions
bash复制代码{
  id: "copilot.firstsuggest",
  title: "AI-powered suggestions",
  description: `Copilot suggests lines of code **as you type** and multiple lines for **function signatures**.

**Prompts in comments** make suggestions specific to your desired outcome, logic and steps.`,
  media: {
    svg: "assets/walkthrough/ai-powered-suggestions.svg",
    altText: "Different types of suggestions visualized",
  },
},
这里描述的是suggestion的能力:
image
如图所示,对于copilot来说,它的suggest主要是以下三种场景:
- 行内补全,对于一行内的代码,会进行行内的推导补全。
- 针对函数的多行补全,对函数的block会进行多行的补全提示。
- 针对命令的补全,在注释中的内容会当做Prompt进行推导补全。
第三步 – Chat with Copilot
css复制代码{
  id: "copilot.chat",
  title: "Chat with Copilot",
  description:
    "Ask Copilot general programming questions in the chat view. Copilot can also fix problems, scaffold tests, or refactor your code. Type ``/`` to view all available chat commands.n[Chat with Copilot](command:workbench.panel.chat.view.copilot.focus)",
  when: "!github.copilot.interactiveSession.disabled",
  media: {
    svg: "assets/walkthrough/copilot-chat.svg",
    altText: "Copilot Chat view in the sidebar",
  },
}
这个是在引导使用copilot的chat插件:

image
这里的按钮就是通过[Chat with Copilot](command:workbench.panel.chat.view.copilot.focus) 渲染得到的。
不得不说chat插件即将正式发布了,在实际的体验过程中还是非常好用的,推荐大家使用!。
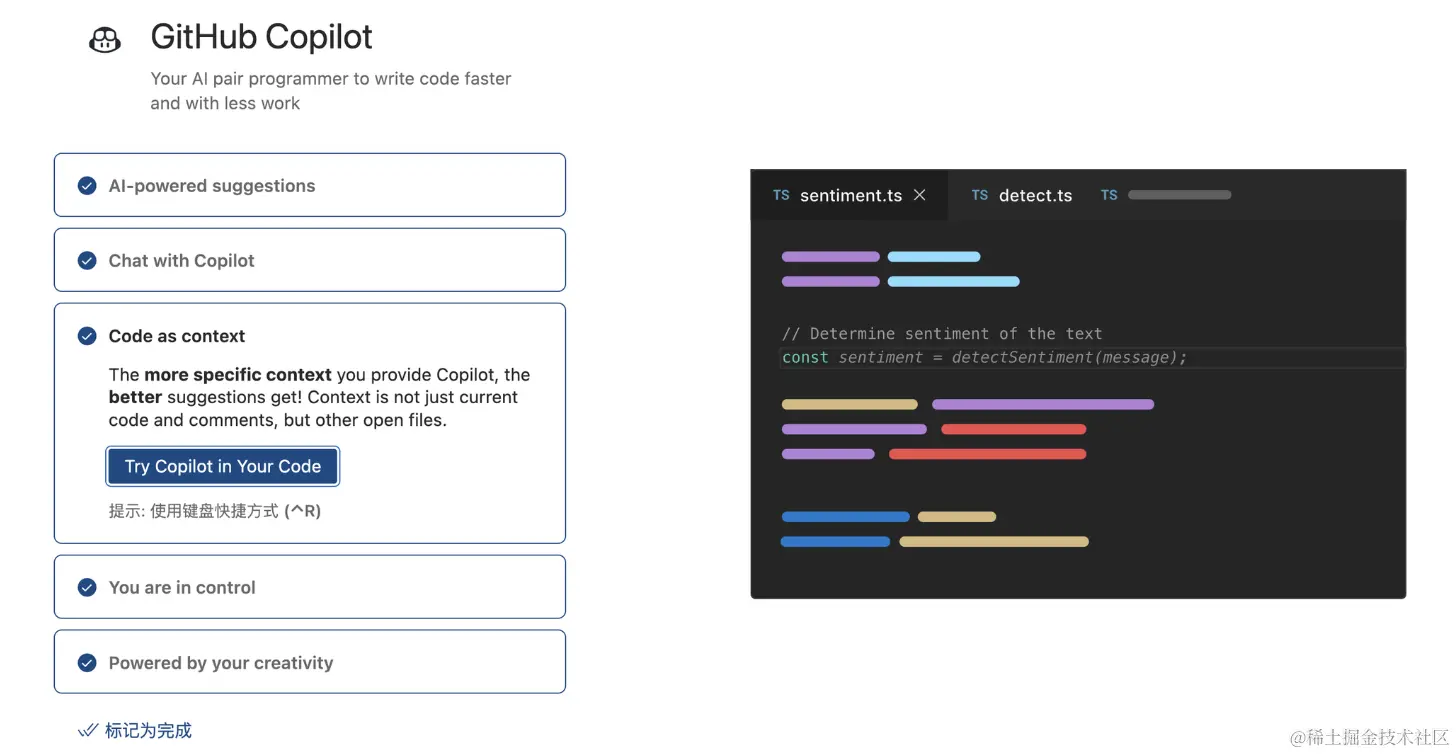
第四步 – Code as context
sql复制代码{
  id: "copilot.realfiles.openrecent",
  title: "Code as context",
  description: `The **more specific context** you provide Copilot, the **better** suggestions get! Context is not just current code and comments, but other open files.

[Try Copilot in Your Code](command:workbench.action.openRecent)`,
  when: "workspaceFolderCount == 0",
  media: {
    svg: "assets/walkthrough/code-as-context.svg",
    altText:
      "An editor with code being suggested by Copilot in gray text",
  },
},
这一步主要提及了copilot一个强大的能力,就是Context,不仅是当前文件的上下文,还能跨文件上下文进行推导:
image
这里就展示了同时打开的detect.ts,也可以推导出来相关的代码。
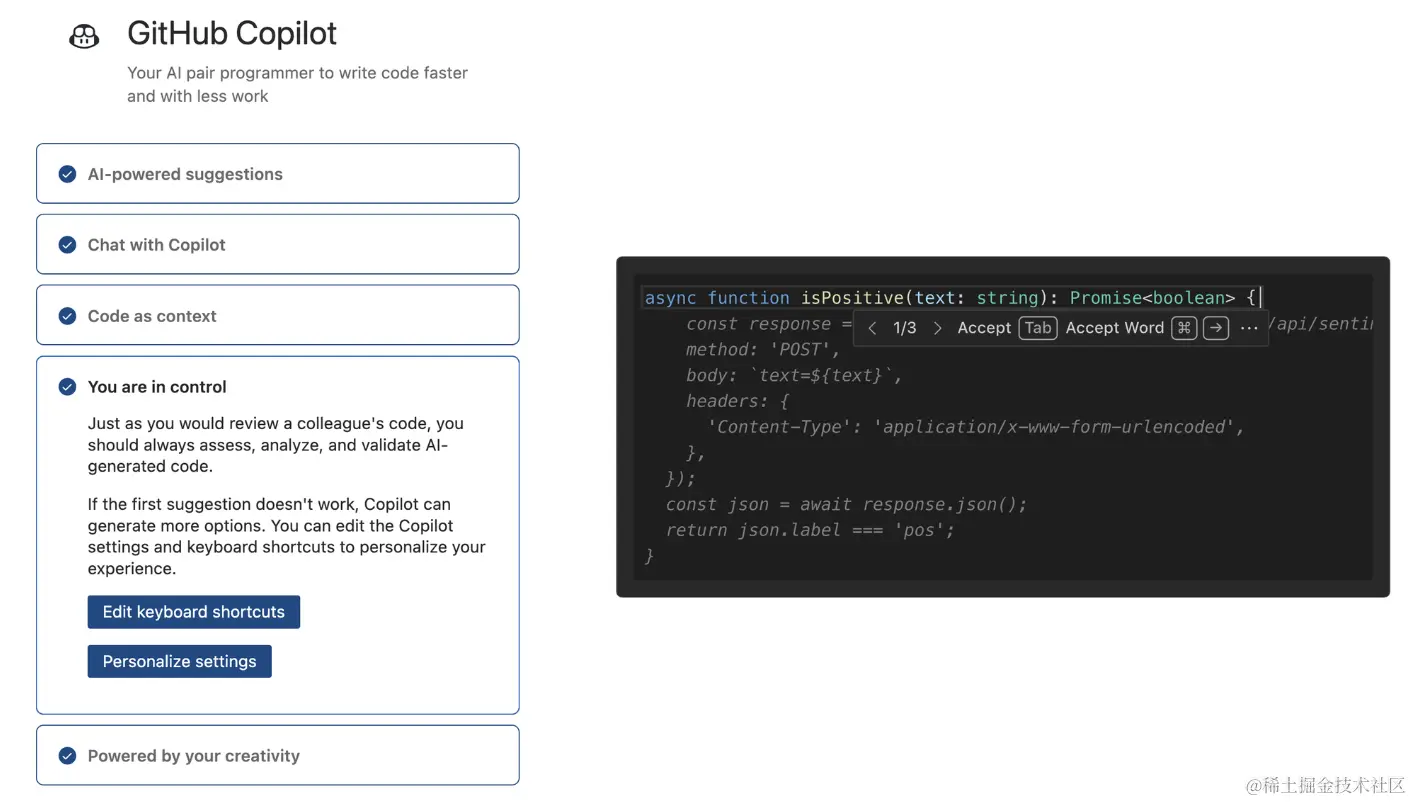
第五步 – You are in control
bash复制代码{
  id: "copilot.iterate",
  title: "You are in control",
  description: `Just as you would review a colleague's code, you should always assess, analyze, and validate AI-generated code.

If the first suggestion doesn't work, Copilot can generate more options. You can edit the Copilot settings and keyboard shortcuts to personalize your experience.

[Edit keyboard shortcuts](command:workbench.action.openGlobalKeybindings?%5B%22copilot%22%5D)

[Personalize settings](command:workbench.action.openSettings?%5B%22copilot%22%5D)`,
  media: {
    image: "assets/walkthrough/you-are-in-control.svg",
    altText:
      "An editor with a toolbar widget overlay showing arrows for navigating multiple suggestions from Copilot",
  },
},
这里展示的是copilot另外一个强大的能力,在推理的意见没有采纳后,会提供更多选项供采纳:
image
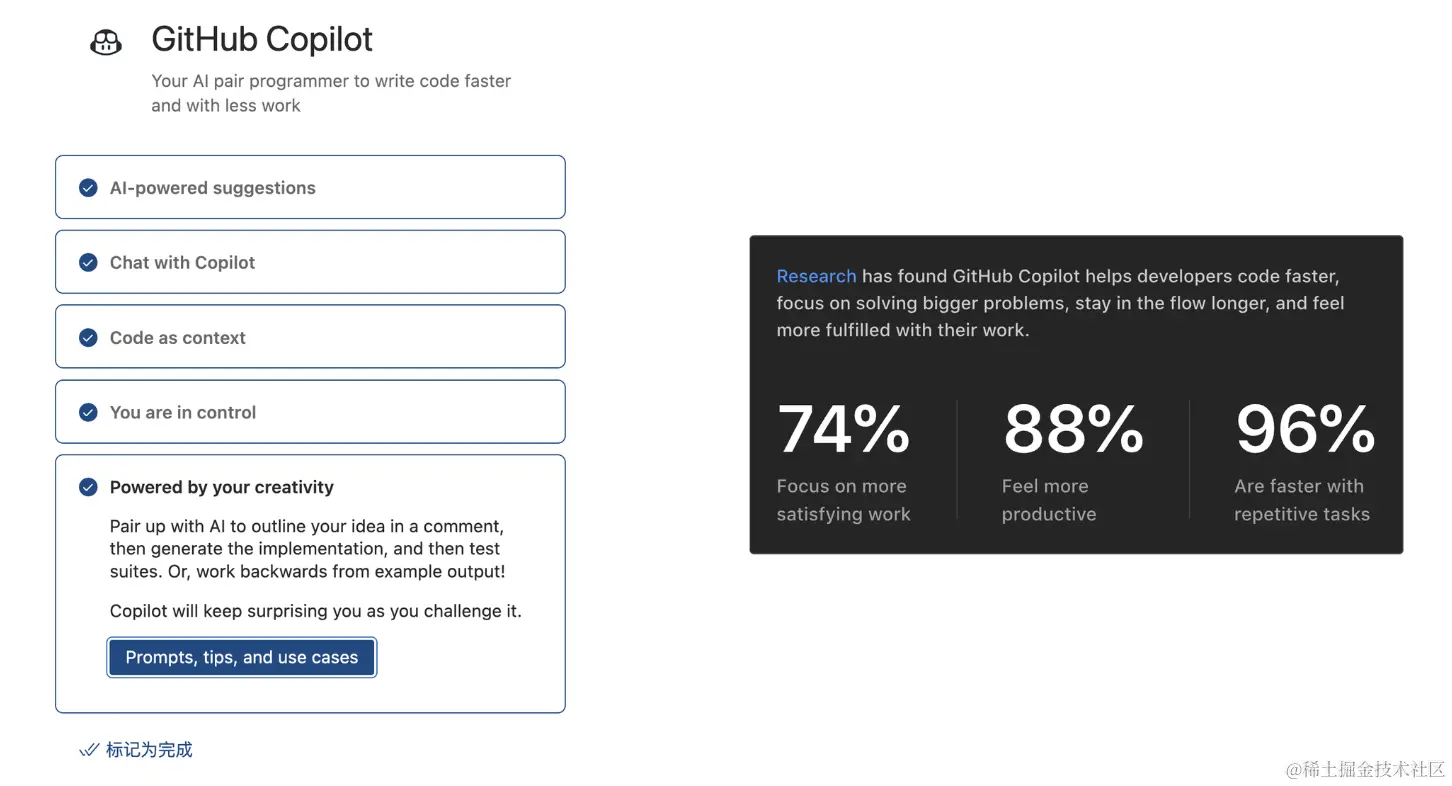
第六步 – Powered by your creativity
csharp复制代码{
  id: "copilot.creativity",
  title: "Powered by your creativity",
  description: `Pair up with AI to outline your idea in a comment, then generate the implementation, and then test suites. Or, work backwards from example output!
Copilot will keep surprising you as you challenge it.

[Prompts, tips, and use cases](https://github.blog/2023-06-20-how-to-write-better-prompts-for-github-copilot/)`,
  media: {
    svg: "assets/walkthrough/powered-by-your-creativity.svg",
    altText:
      "Metrics showing how much Copilot increases productivity for developers. The metrics read: 74% focus on more satisfying work. 88% feel more productive. 96% are faster with more repetitive tasks.",
  },
},
最后一步当然是鼓励大家的话语了,同时也证明了copilot的价值:
image
commands配置
copilot共支持了9个命令:
bash复制代码[
  {
    command: "github.copilot.acceptCursorPanelSolution",
    title: "Accept panel suggestion at the cursor",
    category: "GitHub Copilot",
  },
  {
    command: "github.copilot.signIn",
    title: "Sign In",
    category: "GitHub Copilot",
    enablement: "!github.copilot.activated",
  },
  {
    command: "github.copilot.previousPanelSolution",
    title: "Navigate to the previous panel suggestion",
    category: "GitHub Copilot",
  },
  {
    command: "github.copilot.nextPanelSolution",
    title: "Navigate to the next panel suggestion",
    category: "GitHub Copilot",
  },
  {
    command: "github.copilot.generate",
    title: "Open Completions Panel",
    category: "GitHub Copilot",
  },
  {
    command: "github.copilot.toggleCopilot",
    title: "Enable/Disable Copilot completions",
    category: "GitHub Copilot",
  },
  {
    command: "github.copilot.sendFeedback",
    title: "Send Feedback",
    category: "GitHub Copilot",
  },
  {
    command: "github.copilot.collectDiagnostics",
    title: "Collect Diagnostics",
    category: "GitHub Copilot",
  },
  {
    command: "github.copilot.openLogs",
    title: "Open Logs",
    category: "GitHub Copilot",
  },
],
acceptCursorPanelSolution,采纳在当前cursor下的建议。signIn,登录。previousPanelSolution,上一个建议。nextPanelSolution,下一个建议。generate,打开补全的panel。toggleCopilot,切换是否补全的开关。sendFeedback,反馈。collectDiagnostics,收集一些诊断信息。openLogs,打开日志。
快捷键配置
vbnet复制代码[
  {
    command: "github.copilot.generate",
    key: "ctrl+enter",
    mac: "ctrl+enter",
    when: "editorTextFocus && github.copilot.activated && !inInteractiveInput && !interactiveEditorFocused",
  },
  {
    command: "github.copilot.acceptCursorPanelSolution",
    key: "ctrl+/",
    mac: "ctrl+/",
    when: "github.copilot.activated && github.copilot.panelVisible",
  },
  {
    command: "github.copilot.previousPanelSolution",
    key: "alt+[",
    mac: "alt+[",
    when: "github.copilot.activated && github.copilot.panelVisible",
  },
  {
    command: "github.copilot.nextPanelSolution",
    key: "alt+]",
    mac: "alt+]",
    when: "github.copilot.activated && github.copilot.panelVisible",
  },
  {
    command: "editor.action.inlineSuggest.trigger",
    key: "alt+",
    when: "editorTextFocus && !editorHasSelection && config.github.copilot.inlineSuggest.enable && !inlineSuggestionsVisible",
  },
]
配置了五个命令的快捷键:
generate,ctrl+enter,注意这个when clause,还有点复杂。acceptCursorPanelSolution,ctrl+/。previousPanelSolution,alt+[。nextPanelSolution,alt+]。inlineSuggest.trigger,alt+。
菜单配置
css复制代码menus: {
  "editor/inlineCompletions/actions": [
    {
      command: "github.copilot.generate",
      when: "github.copilot.activated",
    },
  ],
  commandPalette: [
    {
      command: "github.copilot.generate",
      when: "github.copilot.activated",
    },
    {
      command: "github.copilot.toggleCopilot",
      when: "github.copilot.activated",
    },
    {
      command: "github.copilot.sendFeedback",
      when: "github.copilot.activated",
    },
    {
      command: "github.copilot.collectDiagnostics",
    },
  ],
},
editor/inlineCompletions/actions 这个key在官方文档上好像还没有,但推测应该是那个补全提示的菜单?类似于ctrl + /的那个下拉菜单。
commandPalette 是命令面板,也就是我们用ctrl+shift+p打开的面板:

image
在这里主要注册了4个命令(剩下的应该是chat插件注册的):
generatetoggleCopilotsendFeedbackcollectDiagnostics
用户配置
go复制代码{
  title: "Copilot",
  properties: {
    "github.copilot.advanced": {
      type: "object",
      title: "Advanced Settings",
      properties: {
        // ...
      }
    },
    "github.copilot.enable": {
      type: "object",
      default: {
        "*": !0,
        plaintext: !1,
        markdown: !1,
        scminput: !1,
      },
      additionalProperties: "boolean",
      markdownDescription:
        "Enable or disable Copilot completions for specified [languages](https://code.visualstudio.com/docs/languages/identifiers)",
    },
    "github.copilot.inlineSuggest.enable": {
      type: "boolean",
      default: !0,
      deprecationMessage:
        "Deprecated: Please use github.copilot.editor.enableAutoCompletions instead.",
      description: "Show inline suggestions",
    },
    "github.copilot.editor.enableAutoCompletions": {
      type: "boolean",
      scope: "language-overridable",
      default: !0,
      description: "Automatically show inline completions",
    },
  },
}
用户配置主要包含几个字段:
-
advanced,高级配置,比较多下面展开讲。 -
enable,这是一个对象类型,包含了以下几个配置:- *通配,默认是enable的,也就是针对所有场景。
- plaintext,普通文本,默认不启用。
- markdown,默认不启用。
- scminput,这个是在scm那个面板填写commit的input,默认不启用。
-
inlineSuggest.enable,这个已经Deprecated了,用下面的字段。 -
enableAutoCompletions,是否启用inline completions,默认启用。
接下来,我们详细看看advanced的配置:
css复制代码{
  secret_key: {
    type: "string",
    default: "",
    description: "Secret API key",
  },
  length: {
    type: "integer",
    default: 500,
    description: "Length of code to generate in tokens",
  },
  temperature: {
    type: "string",
    default: "",
    description: "Override sampling temperature (range 0.0 - 1.0)",
  },
  top_p: {
    type: "number",
    default: 1,
    description: "Top probability mass to consider",
  },
  stops: {
    type: "object",
    default: {
      "*": [
        `

`,
      ],
      python: [
        `
def `,
        `
class `,
        `
if `,
        `

#`,
      ],
    },
    description: "Configure per-language stop sequences",
  },
  indentationMode: {
    type: "object",
    default: {
      python: !1,
      javascript: !1,
      javascriptreact: !1,
      jsx: !1,
      typescript: !1,
      typescriptreact: !1,
      go: !1,
      ruby: !1,
      "*": !0,
    },
    markdownDescription:
      "Enable or disable indentation block termination for specified [languages](https://code.visualstudio.com/docs/languages/identifiers). Set to 'clientandserver' to run both parser-based and indent-based termination.",
  },
  inlineSuggestCount: {
    type: "integer",
    default: 3,
    description: "Number of inline suggestions to fetch",
  },
  listCount: {
    type: "integer",
    default: 10,
    description: "Number of solutions to list in Open GitHub Copilot",
  },
  authProvider: {
    type: "string",
    enum: ["github", "github-enterprise"],
    enumDescriptions: ["GitHub.com", "GitHub Enterprise"],
    default: "github",
    description: "The GitHub identity to use for Copilot",
  },
  "debug.showScores": {
    type: "boolean",
    default: !1,
    description: "Show scores in sorted solutions",
  },
  "debug.overrideEngine": {
    type: "string",
    default: "",
    description: "Override engine name",
  },
  "debug.overrideProxyUrl": {
    type: "string",
    default: "",
    description: "Override GitHub authentication proxy full URL",
  },
  "debug.testOverrideProxyUrl": {
    type: "string",
    default: "",
    description:
      "Override GitHub authentication proxy URL when running tests",
  },
  "debug.overrideCapiUrl": {
    type: "string",
    default: "",
    description: "Override GitHub Copilot API full URL",
  },
  "debug.testOverrideCapiUrl": {
    type: "string",
    default: "",
    description: "Override GitHub Copilot API URL when running tests",
  },
  "debug.filterLogCategories": {
    type: "array",
    default: [],
    description:
      "Show only log categories listed in this setting. If an array is empty, show all loggers",
  },
},
secret_key,openAI的key。length,code最大生成的tokens,默认为500。temperature,sampling temperature。top_p,Top probability。stops,stop sequences,默认是空行,对于python有单独的定制。indentationMode,这个是缩进模式,可以看到几个主流语言全部都是false。inlineSuggestCount,建议数量,默认是3个。listCount,列表数量,默认是10个。authProvider,认证服务,默认是Github。debug.showScores,打开score分数。debug.overrideEngine,覆盖engine。debug.overrideProxyUrl,覆盖proxy。debug.testOverrideProxyUrl,覆盖test的proxy。debug.overrideCapiUrl,覆盖copilot API url。debug.testOverrideCapiUrl,覆盖test的copilot API url。debug.filterLogCategories,过滤日志等级。
小结一下
在这篇文章中,详细介绍了了 Copilot 的命令配置、快捷键配置和菜单配置,以及用户配置中的高级设置。这是一个很好的起点,让我们更加了解copilot的功能及配置策略,为下一步理解源码打下坚实的基础。
